Tuesday, September 29, 2015
Coon Creek Trail day hike with KILIMANJARO GEAR
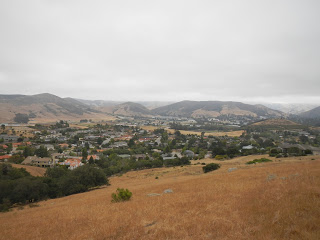
Had the day off so I took a dayhike on the Coon Creek Trail in Montana de Oro State Park. Carried gear in my Kilimanjaro Gear deployment bag and used the Kiligear BALLAST multi-tool on the outing. Trailhead coordinates: N 35 15' 2 8.41" W 120 53' 12.44" . A great outing, beautiful day, sunny and 79 degrees Fahrenheit. Best of all, no snakes!

Monday, September 21, 2015
Make your own walking stick...it's easy!
A few days ago I was working at one of the park's I maintain, when I noticed a sapling laying on the ground. Upon closer inspection I discovered it was a Sycamore and had been snapped off near the base. The sapling had stood in a shelter location, and it has dropped it's leaves, so I am pretty sure it was a deliberate act of vandalism and not an action of wind. I notified my supervisor and then set about cutting up and removing the tree.

Having a hiking stick on trails is very wise. It can be used to balance oneself on loose or steep terrain. You can use it to drag dropped articles back to you, rather than reaching into brush and getting snakebit or stung by nettle. Finally, it can be used as a means of defense against predators. Even the aboriginal peoples here in California understood their usefulness and made walking sticks for their elders. I have made several and been talked out of a couple by friends, so I am always looking to make extras.


Vandalized sapling
Removing the branches, I got down to the trunk and it occurred to me that the tree might be useful for a walking stick. I thought I could make it into something equally beautiful and useful, and in that way, it would have a small victory over the vandals that snapped it off. Having policed up all the branches, I put the trunk aside in the bed of my truck and went back to other duties.
Having a hiking stick on trails is very wise. It can be used to balance oneself on loose or steep terrain. You can use it to drag dropped articles back to you, rather than reaching into brush and getting snakebit or stung by nettle. Finally, it can be used as a means of defense against predators. Even the aboriginal peoples here in California understood their usefulness and made walking sticks for their elders. I have made several and been talked out of a couple by friends, so I am always looking to make extras.

Trunk before being roughed-out
Today I decided to set about making the walking stick. I began by removing the bark and roughing out the shape using a Bolo knife. This is a very useful blade. The heavy belly of the blade is an excellent chopper and it was easy to remove large, tough knots along the trunk. The narrow recurved waist makes an excellent drawknife blade for carving and shaping. The holes in the Bolo blade allow a grip for use as a scraper and removing the remaining inner bark.

Roughed out shaping complete
Having shaped it out in the rough, I set to work with a 4-in-Hand wood rasp refining shape and then smoothing the roughness out.
Having completed that I used sandpaper to smooth the stick. I like my trail stuff a little rustic, and so I do not go overboard and sand until a glass polish is achieved. After all, it's going to get dropped, nicked, scratched, and dented with use. I just want it functionally attractive.
Having sanded it to my satisfaction, I used a pencil to draw a creeping vine pattern on the stick, which I then woodburned over.

Penciling a vine pattern
The final step was to apply a coat of OLD ENGLISH wood oil, and that really brought out the glow.

The finished stick!
I am very pleased with this finished stick. It measures about 48" overall and I would place the weight at around a pound or a little over. It has a nice rounded heavy end near the top, which will serve nicely as a cudgel were I attacked by a dog or other animal on the trail.

Close up detail
Tomorrow I will seek a rubber chair tip for the end and it will be ready for the trail or street!
Happy hiking!
GOBLIN RANGER/BUSHCRAFT WOODS DEVIL
Tuesday, September 15, 2015
Friday, August 14, 2015
Tuesday, July 28, 2015
Learning from YOUTUBE - SIGMA 3 SURVIVAL SCHOOL Youtube "Spoke Basket" lesson
I enjoy watching YOUTUBE videos demonstrating wilderness survival and bushcraft skills, and sometimes I take advantage of the lesson and actually try it out. Such was the case with this excellent tutorial from SIGMA 3 SURVIVAL SCHOOL instructor Josh, instructing viewers on how to craft a "Spoke Basket":
This morning, after getting off work, I went to a nearby micro-wilderness and tried this method using a common material growing abundantly in the creek bed there, Willow. I didn't have time to craft Yucca cordage, nor was there any in this area anyways, so I opted to shortcut and tied my spokes together using Jute cordage:


This morning, after getting off work, I went to a nearby micro-wilderness and tried this method using a common material growing abundantly in the creek bed there, Willow. I didn't have time to craft Yucca cordage, nor was there any in this area anyways, so I opted to shortcut and tied my spokes together using Jute cordage:

Tying the spokes together
I was excited for the skill practice session and got started right away. When I was pretty far along I realized I had skipped a step and failed to cut one of the spokes off at the base and leave 9 spokes rather than the instructed 10. I also took a step not instructed and bound the spokes together at their tops, weaving the green willow pieces in between the spokes. It just made it easier for me than trying to bend and manage the spokes as I went:

Binding the spokes up
As I worked on the project, I could not help but be mindful that I was standing on ground where Aboriginal peoples had hunted and gathered starting 9,000 B.C. It was a beautiful sunny day. A frog gently croaked nearby, birds sang songs and made calls. Somewhere not too distant, a Red-Tailed hawk screeched. Maybe the real benefit of the primitive project is being outdoors, and being reminded what a precious gift the natural world is. The basket began to come together, though a little crooked here and there and somewhat porous. Nonetheless, it'd hold berries and acorns, and that was all I'd intended so it was good by me:

Basket coming together
I had some interesting experiences selecting material. New green branches or shoots fractured easily and were worthless. Too dry and they snapped too. It was necessary to choose seasoned, live Willow branches, flexible but not prone to fracture. For a cutting tool I had carved a wooden handle and fitted a steel Survival Point made by my friend Dan at HARDWOOD HOLLOW BUSHCRAFT & TACTICAL. It was easy enough to just trim the leaves off the Willow branches with just a few quick strokes of the blade.
Once I reached the size and depth of basket I wanted, I bent and tucked the spoke ends into the rim of the basket as demonstrated on the video. The final step was to craft a handle, and again I used Jute cordage as a shortcut and tied the handle on:

Finished product
I have to admit, it's a bit rough, but I was pleased with this first effort. Total time spent was maybe 2 hours. I think next time I will take my time and be a bit more careful in material selection. Seems like in spite of my efforts, branches would sometimes fracture or ends slip out of the spokes [which might be due to the missed step] but that might just be the nature of such baskets.
So, I hoped you have enjoyed this post. I close by offering my thanks and appreciation to Mr. Josh and SIGMA 3 SURVIVAL SCHOOL for sharing their knowledge. Be sure to visit the SIGMA 3 SURVIVAL SCHOOL website and their YOUTUBE channel.
Happy Hiking!
GOBLIN RANGER / BUSHCRAFT WOODS DEVIL
Saturday, June 6, 2015
National Trails Day - hike up Bishop Peak Trail
June 6, 2015 was the date for the AMERICAN HIKING SOCIETY's annual event, "NATIONAL TRAILS DAY" .
This annual event is billed as, "...the country’s largest celebration of trails. National Trails Day events will take place in every state across the country and will include hikes, biking and horseback rides, paddling trips, birdwatching, geocaching, gear demonstrations, stewardship projects and more..."
Checking their website, there did not appear to be any events in my immediate area and, due to work, I didn't have the time to volunteer to host a local event, however, I decided that when I got off work I would go out on a trail and celebrate the day.
I was fortunate to have a short shift that morning, so I decided to hit Bishop Peak Trail, a favorite of mine:

The trail is just a couple of miles from my workplace. It was an overcast morning and driving to the trailhead, I could see the peak was shrouded in low clouds and fog:



This annual event is billed as, "...the country’s largest celebration of trails. National Trails Day events will take place in every state across the country and will include hikes, biking and horseback rides, paddling trips, birdwatching, geocaching, gear demonstrations, stewardship projects and more..."
Checking their website, there did not appear to be any events in my immediate area and, due to work, I didn't have the time to volunteer to host a local event, however, I decided that when I got off work I would go out on a trail and celebrate the day.
I was fortunate to have a short shift that morning, so I decided to hit Bishop Peak Trail, a favorite of mine:

Bishop Peak, San Luis Obispo, CA
Bishop Peak is a volcanic peak located in San Luis Obispo, CA. Part of the Morro's, a chain of volcanic peaks, Bishop Peak is 1,546' elevation and is the tallest of the chain of peaks. The trail is about a 4 mile round trip. Additional information is available on the Hike's Peak.com website.
The trail is just a couple of miles from my workplace. It was an overcast morning and driving to the trailhead, I could see the peak was shrouded in low clouds and fog:

Overcast Peak
I started the hike at about 9:20 a.m. with a 15# daypack loaded with hydration bladder, medical kit, and other items. The hike up was pretty dim, but the cool weather was nice and kept me from breaking a sweat:

Cal Poly State University, center of photo
The trail is very popular with students from the local state university, and there were many groups of students hiking the trail that day. It is a boulder and rock strewn trail and one must be careful to avoid tripping. I used trekking poles on this hike and did see a young male hiker who was descending take a fall and tumble down the trail. I cannot say whether he tripped or slipped, but fortunately he didn't suffer any apparent injury and was assisted back to his feet by his companions:

Typical section of Bishop Peak Trail
The peak has three distinct points composed of boulders, and for this reason was named because of it's resemblance to the Miter hat worn by a Bishop [The town was originally a Mission founded in 1772 by Spanish Missionaries and was named Mission San Luis Obispo de Tolosa, for "Saint Luis, the Bishop of Tolosa".
I finally made it to the summit at about 10:45 a.m. In the photo below, you can see Cerro San Luis Obispo, another of the Morro peak's, situated behind me. It is also an excellent hike if you are visiting in the area:

The summit

Cerro San Luis Obispo, a closer view
I decided to take a break and sat down and enjoyed the view and ate some trail mix. By now the sun had come out *somewhat* and it was now nice and warm:

Break time...trail mix!
After my short break I started back down at about 11:05 a.m. By now the sun was coming out and the trail became very warm:

Hiking back down
As I got to a cattle gate I caught a bit of color out of the corner of my eye and spotted this rainbow colored Lizard called a "Skink" crawling around on the ground:

"Skink" Lizard
I passed a group of cows that were lazing in the shade under a grove of Oak trees:

Shade-tree Cattle
As I descended the trail, I gathered litter I found along the way. Collecting litter is just one way we as hikers can "give something back" for the privilege of enjoying open space trails. Many open space properties, like Bishop Peak Reserve, were donated by ranch families who respected and treasured these lands, and we should have no less reverence for the gift they have shared with us. Mostly lost or discarded plastic water bottles, I managed to fill a cereal box liner bag with recovered trash. I always save my cereal box liner bags and re-purpose them for litter collection, because they are tough and tear-resistant:

Litter bag
I completed my hike at about 12:15 p.m. We're very blessed here in San Luis Obispo County with many trails and natural open space areas to hike and enjoy, and hopefully next year I will be in a better position to perhaps sponsor or coordinate a local National Trail Day event.
Happy Hiking!
GOBLIN RANGER / BUSHCRAFT WOODS DEVIL
Saturday, May 16, 2015
"Scaling" your gear...determining what to take for a safe dayhike.
Often when I go out hiking I always find myself studying other day hikers to see what gear they might be carrying. In my observations, this usually this means little or no gear whatsoever. I would say the average day hiker carries a cellphone and *maybe* a half liter bottle of water. This might be acceptable for some hikes, but I am always surprised when I am 5 or 6 miles out on a back country trail and encounter someone with nothing...no water and no gear whatsoever.

In this blog post, I am going to provide some thoughts and ideas for selecting and scaling your gear for the level of hike you are taking to ensure a safe and enjoyable outing.
To begin, I think we need to consider is "What is the purpose of gear?" Basically, gear is intended to facilitate the outing so that it is done safely, comfortably, and enjoyably. The reverse is also true: too much gear can make an outing unsafe [pack weight impair balance or exhaust bearer] and/or unenjoyable. Some people develop "Kit Mentality", in which gear becomes the focus of their outing, rather than enjoying the natural outdoors.
What we are talking about is "Scaling your gear"; Striking a balance, and taking only what might be needed given the dynamics of the hike we are planning..
Next, I think we need to define what types of hikes we might find ourselves on. I consider hikes to be of three levels:
LEVEL 1 - Short hikes, usually less than 3 miles [5K] total distance, on heavily foot trafficked trails within more or less constant sight of a community or habitation. These would be hikes in open space areas, such as public parks, located within or adjacent to an urban or suburban area. Trails are well defined and cared for. Cellphone service is assured, and you can easily reach a location where you can signal assistance [yelling, whistle, mirror flash]. These are outing of less than 2 hours duration.
LEVEL 2 - Medium hikes which will usually be less than 6 miles [10K] round trip with moderate traffic [occasional mountain bikers and/or hikers]. These would be trails that will take you out of sight of roads or habitation. Trails are worn and intermittently marked with the occasional sign. A map is useful but not necessary. Cellphone service will likely be spotty and unreliable.

Next, I am going to provide some suggestions of what I would recommend one take for each of these levels of outings:
For a LEVEL 1 hike, I think one probably can pull off a hike with, as my wife has suggested little more than a bottle of water and a knife. Of course, having your cellphone along is very helpful. In the photo below, I show items carried on a recent L1 hike: A fleece jacket, water bottle, wallet cutting tool, sun hat, warm knit cap, small flashlight, cellphone. A pack is not required...all of these items can easily be carried in one's pockets.

Finally, on a LEVEL 3 hike I recommend you "go heavy" and treat it as an overnight stay, just in case that becomes a reality. In the photo below I have laid out my kit for such an outing. We see that the kit covers First Aid, shelter material, fire making, hydration, food, signaling, cordage, and many other useful items for surviving a night or two lost or injured on a trail.

- Weather: Hot or cold conditions, precipitation. It may be that you live in a region where weather can change dramatically and quickly. In that case it might be wise to carry a bit of extra clothing, perhaps a jacket with hood.
- Fitness: Your level of conditioning [or lack thereof] medical issues, required medications. Do not exceed your ability. If invited on a hike assess to determine whether it is within your ability. Make any hike host aware of your limits or medical issues in advance of the hike.
- Terrain: elevation gain, trail conditions and strata [loose rocks, deep sand, etc.] not only affect shoe choice, but whether a hiking stick or trekking poles should be carried. Obviously these would not be needed on a flat, smooth park path.
- Dangers: Dangerous wildlife has increasingly been seen coming into the front country of many areas. You don't just see them in the back country anymore. Be aware of tracks and how to deal with wildlife should you encounter them on the trail.


The further out you go, the more gear you should take.
Anyone who follows this blog knows that this is an especial pet peeve of mine, and that I have often suggested that there is "No such thing as a day hike"; in other words, plan & prepare for an overnight stay. My wife is an experienced obstacle racer and trail runner and we have had several discussions about this. She is of the opposite opinion; that you really don't need any extra gear...just a bottle of water and a knife is adequate for most outings. And for some people that may be all right.
In this blog post, I am going to provide some thoughts and ideas for selecting and scaling your gear for the level of hike you are taking to ensure a safe and enjoyable outing.
To begin, I think we need to consider is "What is the purpose of gear?" Basically, gear is intended to facilitate the outing so that it is done safely, comfortably, and enjoyably. The reverse is also true: too much gear can make an outing unsafe [pack weight impair balance or exhaust bearer] and/or unenjoyable. Some people develop "Kit Mentality", in which gear becomes the focus of their outing, rather than enjoying the natural outdoors.
What we are talking about is "Scaling your gear"; Striking a balance, and taking only what might be needed given the dynamics of the hike we are planning..
Next, I think we need to define what types of hikes we might find ourselves on. I consider hikes to be of three levels:
LEVEL 1 - Short hikes, usually less than 3 miles [5K] total distance, on heavily foot trafficked trails within more or less constant sight of a community or habitation. These would be hikes in open space areas, such as public parks, located within or adjacent to an urban or suburban area. Trails are well defined and cared for. Cellphone service is assured, and you can easily reach a location where you can signal assistance [yelling, whistle, mirror flash]. These are outing of less than 2 hours duration.
LEVEL 2 - Medium hikes which will usually be less than 6 miles [10K] round trip with moderate traffic [occasional mountain bikers and/or hikers]. These would be trails that will take you out of sight of roads or habitation. Trails are worn and intermittently marked with the occasional sign. A map is useful but not necessary. Cellphone service will likely be spotty and unreliable.

Can you yell this far and be heard?
LEVEL 3 - Long hikes more than 6 miles [10K] in one direction on isolated trails with little or no likelihood of encountering other hikers if assistance was needed. These would be outings of several miles and several hours duration which would take one well out into wilderness or back country regions. Trails may be very rarely marked, not maintained, overgrown, and a map is an absolute necessity. Cellphone service would likely be non-existent. These are day long outings.
Next, I am going to provide some suggestions of what I would recommend one take for each of these levels of outings:
For a LEVEL 1 hike, I think one probably can pull off a hike with, as my wife has suggested little more than a bottle of water and a knife. Of course, having your cellphone along is very helpful. In the photo below, I show items carried on a recent L1 hike: A fleece jacket, water bottle, wallet cutting tool, sun hat, warm knit cap, small flashlight, cellphone. A pack is not required...all of these items can easily be carried in one's pockets.

Light kit for a quick hike
On a LEVEL 2 hike, I think a small day pack or hydration pack or fanny pack will suffice. Besides those items shown in the L1, carry a few snacks, extra water, a whistle and a small First Aid kit [read cuts and scrapes].
Finally, on a LEVEL 3 hike I recommend you "go heavy" and treat it as an overnight stay, just in case that becomes a reality. In the photo below I have laid out my kit for such an outing. We see that the kit covers First Aid, shelter material, fire making, hydration, food, signaling, cordage, and many other useful items for surviving a night or two lost or injured on a trail.

Overnight Trail Kit
I think we need to consider that there are always variables that we need take into account, and should always adjust our kit to accommodate:
- Weather: Hot or cold conditions, precipitation. It may be that you live in a region where weather can change dramatically and quickly. In that case it might be wise to carry a bit of extra clothing, perhaps a jacket with hood.
- Fitness: Your level of conditioning [or lack thereof] medical issues, required medications. Do not exceed your ability. If invited on a hike assess to determine whether it is within your ability. Make any hike host aware of your limits or medical issues in advance of the hike.
- Terrain: elevation gain, trail conditions and strata [loose rocks, deep sand, etc.] not only affect shoe choice, but whether a hiking stick or trekking poles should be carried. Obviously these would not be needed on a flat, smooth park path.
- Dangers: Dangerous wildlife has increasingly been seen coming into the front country of many areas. You don't just see them in the back country anymore. Be aware of tracks and how to deal with wildlife should you encounter them on the trail.

Coyote track along trail
A final word: Nothing I have said here is intended to dissuade anyone from carrying more gear should they decide to do so. In my own case, I prefer to always carry a day pack equipped with some extra clothing, a GRABBER "Sportsman" reflective blanket, extra water, some food, medical supplies, a sheath knife, signaling and fire making tools; essentially everything needed to spend a night on the trail if it were necessary to do so and to care for myself or render aid to another were an injury to occur. I have on at least one occasion provided water to a person suffering dehydration. I have arrived late at 2 injury scenes where help was being provided, but expect someday it may fall on me to help with a trail injury victim.
I hope you have found this article helpful and useful.
Happy Hiking!
GOBLIN RANGER / BUSHCRAFT WOODS DEVIL
Subscribe to:
Posts (Atom)