Sunday, January 5, 2014

Hiking with a Haversack

If you spend anytime in bushcraft, you'll become aware of the term "haversack". In case you don't already know, a haversack is nothing more than a shoulder bag with a single shoulder strap. They were used extensively my military forces around the world for centuries. During the U.S. Civil War, soldiers often used canvas haversacks and some officers carried haversacks constructed of tarred leather [waterproofing]. They were issued to U.S. forces right up through WWII.


My haversack...a surplus British military shoulder bag with a
Soviet M91 rifle sling for a strap. Very tough, solid canvas.

Haversack's are not designed nor intended to be used as a backpack, and they're definitely not intended for a heavy load. They're meant for carrying just a very few essential items, usually meal rations and little more. A more modern variation would be the "messenger bag" that became popular with bicycle messengers and was often seen on the TV action program "24".

In recent years, outdoors instructor Dave Canterbury [The Pathfinder School, LLC] has done much to re-introduce and promote traditional or "classic" bushcraft skills. Canterbury developed his "5 C's" concept of absolute minimal outdoors survival gear one should possess when a-trail: CORDAGE, a CUTTING tool, a COMBUSTION [firemaking] device, a COVER [sheltering material], and a CONTAINER [water gathering vessel]. Canterbury adopted the classic haversack as a means of carrying this minimal gear, and it can be seen in many of his earlier "Wilderness Outfitter" or "Pathfinder videos on YOUTUBE [ http://www.youtube.com/user/wildernessoutfitters ].

I occasionally use a haversack on those days when I want to travel light on a day hike. I would suggest that they are a good choice for the occasional or amateur hiker who doesn't want to buy a lot of gear, but only wishes to carry a few essentials for a comfortable hike, i.e., a bottle of water, some food, sunscreen, and a few other essentials. However I still suggest that even an amateur carry a few items necessary for surviving a cold night lost or injured on a trail. In the following photo's, I will share the contents of my own Haversack.

Contents of my Haversack

In the above photo, we see the contents of my haversack...In the TOP ROW are a sealed plastic bag with a lightweight emergency poncho [COVER or shelter], a Space Blanket, and chemical lightstick. I also have included a RITE IN RAIN notebook/pencil for making notes or sketching trail features for way finding, 100' bundle of 550 paracord [CORDAGE], a small First Aid kit, and a Flint & Steel kit and a candle with matches [COMBUSTION, or firemaking]. In the BOTTOM ROW I have my STANLEY cookset [CONTAINER for gathering water and ability to boil the water in order to disinfect it], a spork, a Swiss M71 jellied fuel stove, and some trail food items. The total weight of the pack is around 6 lbs., and is seen packed in the photograph below: 
 
All kit items pack very nicely inside the haversack.
 
If you have paid close attention you will have noticed that I only mentioned four of Dave Canterbury's "5 C's of Survival". Some items should always be carried on your person at all times in case you become separated from your pack. Specifically, your knife [CUTTING tool] and a means of making fire. To that end, I carry a knife, either a fixed blade sheath knife or folder on my person and an additional means of making fire:
 
Always carry a knife and firemaking means on your person!
 
In the photograph above, we see a self made 2-twist lanyard with carabiner for attaching to my pants belt to prevent loss of  my ferro rod and striker, and my matchsafe. I've also attached a spare blade, a tiny carabiner knife [a wonderful Holiday gift from youngest daughter Erin...made razor sharp after an hour or so re-profiling the blade on my stones] for picking splinters and performing small cutting chores.These items are then tucked deep into my pants pocket. Finally, I carry the excellent ESEE "ZANCUDO" folding knife from Randall Adventure Training [ http://eseeknives.com/index.html ].
 
It is always advisable to carry a canteen, which has a cap and is a secure means of carrying water. Once the water has been treated chemically or disinfected by boiling in a cookpot or vessel, it can be transferred to the canteen for consumption anytime you wish. I prefer a single-walled steel canteen or bottle that can also be placed over a fire to achieve a boil [CAUTION: LEAVE CANTEEN UNCORKED AND DO NOT USE DOUBLE-WALLED BOTTLES FOR BOILING...THEY CAN EXPLODE].
 
A handy tool to have is a spring steel "Fish Mouth Opener" hook, like the one shown here...it is compressed and placed inside the bottle and then released to suspend the bottle over a fire. It easily fits in the haversack:
 
KLEAN KANTEEN with hook manufactured by
 HARDWOOD HOLLOW TACTICAL

You don't have to spend a lot of money either. Unlike a pricey new pack from a sporting goods store, the haversack I use was found at a garage sale and purchased for .50 cents. I later added an old canvas rifle sling for the carrying strap, which makes it handy for hanging from a limb off the damp ground:
 
My haversack. All I need for a day outing is
easily carried inside of it.
 
Surplus stores often have bags that can be modded into a haversack [Dave Canterbury has modded a n old USGI buttpack into a haversack by adding a shoulder strap]. Another option might be a castoff photographers bag.
 
There are also new commercially made haversacks or messenger bags available, some I've seen for as little as $20.00, and some like those made by CHROME cost much more. Either way, if you are considering hiking but don't want to carry a heavy pack, you might do well to consider carrying your trail essentials in a traditional haversack. Happy Hiking!


© 2014, MANNY SILVA, ALL RIGHTS RESERVED


Sunday, December 29, 2013

A friend's personal story of survival...

A few days ago I received an e-mail from an old friend from High School, Tony V., who described an outdoors survival situation he'd experienced some time back. Tony has a lot of outdoors experience; he is a B.S.A. Eagle Scout, been a Youth Conservation Corps trail crewman, and a lifelong fisherman and hunter...a real-life rugged guy. He has graciously agreed to allow me to share his story here, stating he hopes others can learn from it. Here's his account of the event just as he told it to me:
 
"Thought I would share with you. Once when I was elk hunting I had hiked too fast and too far, working up quite the sweat. The temperature had been about 25 degrees. Still not bad until the clouds came in and temperature dropped to 5 degrees. I was about 3 miles from the SUV. Snow was about 6 to 8 inches deep, so I had at least two hours of a walk ahead of me.

I was on a flat lumber access trail coming down the mountain. I had come to an area that had a bunch of old dead cut timber stacked on the trail. I decided to start a fire as I was shivering uncontrollably off and on. The gaps between the shivering getting smaller, while the length of the shivering was growing longer.

So, I built a nice pyramid of dry wood. I found dry wood under the first layer of stacked wood. I had matches, a lighter and a Gerber fire striker. When at 10,000 feet and 5 degrees temp, butane lighters don't work. No ignition…

So, I thought I would try the Gerber striker. Wow, it only took me about four attempts and the fuel/paraffin cube that store in the handle lit perfectly! I slid it under the wood and presto, I had a nice fire going. Total time from stopping on the trail and having a nice fire was about nine minutes.

I was a sales rep for Gerber and had sold hundreds of those items, so I wanted to see if they would work. I have to give it an A+!  I had a big fire, so I warmed up and took off the outer layers and dried them out. I had a snack and drank some water [I should mention, the guy who was with me was shivering all the time and had trouble speaking].

We took about a 45 minute break and then put the fire out and off we went. By the time we got to the SUV the temp had again dropped to -5 degrees. I did manage to bag an elk the next day about 100 yards from the warm up spot.

The Gerber Strike Force is now a permanent part of my survival kit and go bag. I don't even know if they make them anymore. It has been changed to the Bear [what's his name?] strike force."


Tony's life-saving Gerber "Strike Force"

It appears to me that Tony set out to hunt in reasonably good conditions, but got caught in an unexpected and severe weather change; change that then set off a chain of events that resulted in a desperate survival situation. This happens to many people who hike or hunt outdoors. A sad and fatal example of severe weather change and being ill-prepared for such an exigency occurred in January of this past year in Missouri and is reported here:  http://www.foxnews.com/us/2013/01/14/air-force-veteran-and-his-2-sons-die-while-hiking-missouri-trail/

Fortunately Tony's situational awareness and outdoor skills pulled him through. As we head into Winter, there are a few points presented here that are worth reviewing for those who are planning to venture outdoors:

1. Listen to the weather forecast and plan accordingly. Understand that weather can change without warning and temperatures can plunge dramatically.  Be prepared and plan ahead for the possibility of severe weather changes.

2. Dress in layers, with a wind-resistant outer layer. Wear a hat (a large amount of body heat is lost from the head) and mittens or insulated gloves. Keep your face warm by wearing a scarf, neck tube or face mask. Wear warm and waterproof footwear that fits properly.

3. Avoid over-exerting yourself, wear moisture wicking fabrics, and stay dry. Wet clothing chills the body rapidly. Remove outer layers of clothing or open your coat if you are sweating.

4. Seek shelter from the wind, which can add to the chill factor. Stay hydrated and maintain caloric intake. The body needs to be adequately hydrated in order to prevent cold weather injuries. The human body requires 10% more calories just performing mild work in cold conditions.

5. Have several tools to make fire, and practice fire making skills in advance of needing them. In this instance, 2 of the 3 means of fire making Tony V. had with him failed, but the third method he'd packed in his kit succeeded in making fire.

6. Be able to recognize the onset of hypothermia and immediately take steps to get warm again. In this case my friend recognized that his shivering was worsening by the minute, and that he had to make a fire immediately to save himself and his hunting companion.

Finally, here is a simple acronym you can use to remember steps for staying warm:

C-O-L-D-E-R

C -  Keep skin COVERED and your clothing CLEAN.
O - Avoid OVERHEATING.
L - Wear clothing LOOSE and in LAYERS.
D - Keep clothing DRY.
E - EXAMINE clothing for tears and defects.
R - Keep clothing REPAIRED. 

Special thanks to Tony for allowing me to share his outdoor experience!


© 2013, MANNY SILVA, ALL RIGHTS RESERVED

Monday, December 23, 2013

Primitive Hunting: The Throwing Stick

In my last blog I discussed slingshots as a bushcraft survival tool for hunting small game. Now I'd like to discuss an even lower tech tool that is easy to make and doesn't cost anything...the Throwing Stick or "Rabbit Stick" as it is sometimes called.

Throwing sticks are a primitive technology that were used for centuries by aboriginal peoples around the world. Probably the most well known throwing stick in the world is the "Boomerang" as made famous by the aboriginal hunters of Australia. Here in California, aboriginal hunters also used aerodynamically shaped throwing sticks, some naturally curved and others bent to shape using heat [For further on native California throwing sticks, refer to the excellent book SURVIVAL SKILLS OF NATIVE CALIFORNIA by Paul D. Campbell].

Basically, a Throwing Stick or "Rabbit Stick" is just a piece of wood, about wrist diameter and about as long as the span from your arm pit to your wrist. It can be curved or straight. For close range throws it needn't be aerodynamically shaped to work effectively at harvesting small game animals. I would suggest processing the stick and sanding rough bark off so that it will slip smoothly from your hand when thrown. Smoothing will also so make for less wind resistance [friction] and noise when the stick is in flight.

Throwing Sticks

You're not looking for a "clean kill" Per Se [though that certainly can occur],  but if nothing else you want to stun or disable a small game animal long enough to run up on it and humanely and quickly finish it off with a hard blow to the neck behind the head. Once harvested, the game animal can be cleaned, cooked, and consumed. Always remember that it is completely wrong to kill animals for the sole purpose of killing...eat what you harvest is the rule for an ethical hunter.

There are essentially 2 ways to throw a Throwing Stick...vertically and horizontally. Both throws begin with the stick resting on your shoulder in the primitive hunter position while you move quietly stalking game. By being raised in a ready position, you remove the additional movement needed to set the weapon for a throw and thus telegraph your intent to the game animal. Remember that most animals rely on smell, sound, and movement to detect danger. They will react instinctively and seek the safety of cover if they detect a predator in the vicinity.

If you are in a wooded area, you'll want to consider throwing the stick vertically so it doesn't strike a tree and be deflected or stop altogether en route to the target. This is also a good throw for say, a bird or squirrel that is perched on the side of a tree.

If you are in an open area, such as in low desert scrub or open meadow, the horizontal throw [sometimes called sidearm] is best because it can skim across the ground, and can even bounce up and still hit a target if you misjudge the throw. This is the throw you'd use for a squirrel sitting atop a log for instance.

One trainer I am aware of has suggested a third throwing technique, the diagonal throw, which they cite as a compromise between the horizontal and vertical throws and claim to have the best chance of hitting.

Like anything that involves throwing [Frisbies, baseballs, etc.], practice is required to become proficient. I can tell you, throwing a stick and hitting an object even just 7 yards away is not easy for many people. I guarantee you'll hold onto some sticks too long and overthrow and others you will release too soon and under throw...practice is essential. Have several throwing sticks available so you don't have to retrieve a single stick every time you throw in practice.

For best practice results, I recommend making a "throwing range". I use the one depicted in the photograph below:

 
Throwing stick practice range
 
I've driven a willow stake into the ground as a point from which to throw. A second stake is driven into the ground 21' [7 yards] away. An old plastic bottle or apple juice bottle is placed with it's mouth over the stake to act as my target [keep the target close in size to a squirrel or rabbit, so it is realistic for the game you may have to hunt]. Finally, I have driven a third stake 21' further beyond the target stake. I've settled on 7 yards because in my experience, it is about the closest many animals like rabbits will allow you to approach before spooking. Too far and the animal may perceive the object in flight and evade being hit.

Generally as I practice throws, the throwing sticks come to rest at or near the distant stake. I re-set the target as I pass on my way to gather the sticks and then throw in the reverse direction. In this way, you get twice the practice for one effort, rather than gathering and returning to the original throwing point.

I've also seen folks practice by stretching a rope between 2 trees and throwing at suspended bottles or milk jugs. I think that would be a good system for practicing the vertical method. Either way, anything that helps train and develop your hand-eye coordination for throwing is good.

Finally a word about safety: When you are at practice, make certain no one is within range of being hit and injured by a throwing stick. A stick weighing around a pound or so contains a lot of energy and can cause significant injury. Keep observers and pets a safe distance behind you when throwing and stop throwing immediately if someone wanders into range.


© 2013, MANNY SILVA, ALL RIGHTS RESERVED

Sunday, December 22, 2013

Slingshots for bushcraft

A slingshot can be a handy and silent tool for harvesting small game when backpacking or in a survival situation. Some commercially available models have even been modified to project an arrow. Many bushcraft practitioners carry one in their woods trekking bag for such uses, as well as fun camp recreation. The purpose of this blog is to discuss the history and safe use of slingshots and to perhaps inspire you to give them a try.

Slingshots have been around since the introduction of rubber in the late 1830's, and were widely in use by the 1860's. Projectiles of the period included lead musket balls or shot as well as round stones. Initially they were a self-crafted tool, but by the early 1900's commercially manufactured slingshots were available for purchase. In the 1960's the next big evolution, the "Wrist Rocket", arrived with a frame that incorporated an integral arm brace and used surgical rubber tubing to power the slingshot.

I own and use 2 slingshots, a DAISY F16 [no arm brace] and a MARKSMAN folding slingshot with an integral arm brace:


Slingshot kit: Slingshots, shot, carrying/storage box

Assuming you have purchased a quality slingshot and shot, you need only find a safe place to practice and a safe target to shoot at. You will have to develop a style that works for you, but here are some *generic* tips for shooting a slingshot that may help you:

- Grasp slingshot with support hand, draw bands with dominant [strong] hand.

- Point in on the target with the shoulder of the arm holding the slingshot.

- Draw the bands straight back; Don't cant the slingshot...keep the yoke arms perpendicular to the ground and the bands parallel to the ground.

- Use a consistent anchor point on your lower jawline. NEVER draw the bands to your eye level, as they can break and cause injury and/or permanent damage your eye.

- Practice at varying distances and learn how to use the slingshot arms/yoke as a reference to adjust your point of aim.

- Gently relax hand and release the shot pouch when you are sure of your shot. There is no need to "explosively" release the shot pouch!

- Use protective eyewear for safety. Observers should also wear goggles or protective eyewear.

- Be sure of your target and what is behind it; Never draw and aim a slingshot at anything you don't intend to shoot; Never horseplay or intentionally aim a slingshot at another person.
 
Use consistent weight/size ammunition for practice, such as commercially made shot, for best results [Interestingly, a good friend of mine uses "Skittles" candies for practice ammunition. He states they actually make "good practice ammo", are inexpensive for a large quantity, are biodegradable and are pretty consistent in size and weight].


Left: MARKSMAN folding slingshot; Right: DAISY F16.

In the photograph above, you can see that the MARKSMAN has a 3" wide yoke, and the DAISY has a 4" wide yoke. I shoot better with the DAISY, bracing my index finger and thumb on the arms of the yoke [The smaller 3" yoke on a non-wrist-supported slingshot would work better for me...the DAISY is a bit of a stretch for my fingers, but I shoot well with it].

More than anything, becoming proficient with a slingshot requires a LOT of practice. Be prepared to invest some time, to lose some shot, and to not be disappointed if proficient skill doesn't immediately come to you. Be patient and persistent!  Become proficient at several distances. I shoot at 21, 30, and 40 foot distances every time I practice.

When choosing a place to practice, you should select an area that allows safe shooting and no chance of a stray shot hitting someone or damaging property.

Also check local laws and ordinances to confirm it is lawful to use a slingshot in your community.

I like to practice at some horseshoe pits in a nearby public park. The pits are situated in a large open field, far from the roadway and picnic areas, and allows a good 360 degree view of the area for safety:


  The horseshoe pit allows a solid backstop.  

You should only shoot against a safe backstop that won't cause a shot to ricochet. For increased safety, I use a piece of carpet hung over the backboard to deaden the impact and greatly reduce chances of a ricochet [ALWAYS REMEMBER: A Sling-shot is very powerful and can cause serious injury!]:

 
Tin can badly dented by impact of shot. Obviously
Such impact could cause serious injury or even the 
 loss of an eye were the projectile to strike someone.

Care should also be taken to regularly inspect the bands of your slingshot for tears or damage that may result in failure and then injury to you. If the bands appear old or dried out, you should replace them with fresh rubber bands, or a new shot pouch if it is worn or damaged.

Finally, if you do use the slingshot for hunting small game, harvest the animal humanely. Never take a shot unless you are sure you can make a clean kill. If you do take an animal such as a rabbit, clean, cook, and consume it. Killing game animals for the sake of killing is inhumane and completely unacceptable.


© 2013, MANNY SILVA, ALL RIGHTS RESERVED

Friday, December 13, 2013

The "Fire Bag"

One of the most important skills a trails hiker must possess is the ability to make fire. Fire is critical in a survival situation. It allows you to avoid a cold night lost or injured on a trail and thus becoming hypothermic, to disinfect water by boiling, and can be used to signal for rescue.

 
Fire is made by careful preparation and progression: Tinder, Kindling, Fuel.
 
The purpose of this post is to simply point out the importance of having several different means to ignite a fire. Gathering tinder, making kindling, and progressing a fire until it will burn fuel [logs] are skills that should be practiced, understood, and mastered by means of real outdoors experience.

With the possible exception of the Doan's Bar [Magnesium bar], no single means of making fire works 100% of the time. I strongly suggest that all trail hikers and backpackers assemble a dedicated "Fire Bag" which contains several means of making fire, and then place that bag in your trail day pack or backpack and carry it with you always.

Many people opt to just carry a lighter, and call it good. Lighters can be useful, but they can also fail. If they become wet they won't work until dry again. You could suffer a fall and lose or break them.

A good friend & mentor, Bill Hay [Bill-Hay.com] was a student of the late Dr. Ron Hood [a knowledgeable and respected survival instructor and founder of Survival.com], and is a member of the HOODLUMS outdoor survival group/forum. Bill offers the following thoughts:

"Lighters also fail in the cold, and the plastic will shatter in the cold. They run out of fuel. I've seen them discharge all their fuel in a pack. Oops! No fire tonight! They are not as easy to start a fire with as you might think, it's not a magic tool. Carrying dry tinder, Fatwood & a sparking rod is way more reliable."

[Bill has kindly posted his own kit here: http://bill-hay.com/FireKit/FireKit.htm ].

As stated, nothing works 100% of the time, and having multiple fire making options [redundant systems] significantly improves your chances of surviving a cold night should you become lost or injured on some trail. Carrying some dry tinder and Fatwood kindling dramatically increases chances of making a successful fire.

In the photo below, I've displayed the contents of my own "Fire Bag":


CLOCKWISE FROM BOTTOM: Butane lighter; 3/8" USAF ferro rod from Firesteel.com [http://firesteel.com/FireSteel-Armageddon] with a kydex striker from Hardwood Hollow Tactical ; Burning lens; Flint & Steel kit; Matchsafe with waterproofed matches; Doan's bar [ferro rod dismounted and epoxied into antler tip. CENTER: selfmade leather pouch containing Fatwood kindling. Note the hanks of paracord attached to the USAF ferro rod for use in constructing a bow drill set.

Having tools is pointless unless you know how to use them. It is critically important to practice firemaking on a regular basis. You should also know a few ways to make fire by primitive means in case you lose your fire kit:


Self-made bow drill set made with local materiel.


Practicing primitive firemaking [bow drill] on a backpacking trip.
 

One final thought: It is also very important to practice doing so in less than ideal weather, so that you can experience the difficulties of making fire in wet conditions, with cold, numb hands, or in high winds for instance. Nothing replaces real-world experience, and it also serves as "stress innoculation" to mentally prepare you should an actual trail mishap occur.


© 2013, MANNY SILVA, ALL RIGHTS RESERVED

Tuesday, December 10, 2013

"Survival" Knives

One of the questions people often ask is regarding the so-called "Survival" knives; whether they are a good choice for hiking, camping and outdoor activities. Firstly, I would tell you that a "Survival Knife" is whatever blade you have on your person when a survival situation presents itself.   Usually the humble slip joint pocketknife is what most folks carry, and it will answer most trail and camp chores satisfactorily:


Common slip-joint pocketknives

A fixed blade sheath knife with a 4 to 5 inch blade is very useful for chores requiring a heavier, stronger blade, such as carving tent or tarp pegs or splitting kindling [batoning]. A knife with a full tang is an excellent choice. Two that I own and use are the traditional KA-BAR fighting utility knife of U.S. Marine Corps pattern and the Gerber "Bear Grylls Ultimate Knife". Both have a strong tang inside the handle that will withstand heavy use:

 
Ka-Bar 1211 knife [USMC pattern], 7.5" blade 


GERBER "Bear Grylls Ultimate Knife", 5" blade

Some folks choose hollow-handled, sawback [HH/SB] survival knives like those made popular by the RAMBO movies of the 1980's. These knives often incorporate a compass into the pommel cap and the handle is equipped with a few survival necessities, such as matches, and some fishhooks and line. As can be seen in the photo below, these knives have a very small tang which fits into a hollow handle. Usually they fail under heavy use and separate at that critical blade/handle joint. The knife below was broken by me after only a few minutes work chopping a limb for kindling: 


Inexpensive hollow-handled "survival" knife

Personally, I really like HH/SB knives. The problem is, I've never owned one that could hold up to the work I assign it...they seem to be either very cheap and poor construction or very expensive custom-made knife [beyond my budget]. I've yet to find an affordable "quality" HH/SB that could perform hard use tasks.   

As stated before, if I am going in harms way, I'll take a full tang knife, usually my KA-BAR 1211. I don't need a hollow handle to carry matches and water tablets [you should be carrying an ALTOIDS kit in your pocket with those things anyways].

I'm also fond of having a neck knife for small chores. These are a small [sub-3" blade] fixed blade knife that is worn around the neck and easily accessible:


KA-BAR "ESKABAR" neck knife, 3" blade


KA-BAR "Acheron" neck knife, 3" blade
 
Something else to consider: There's a saying that "Two is one and one is none", meaning you should carry a spare in case one is lost or fails.I would also state you should consider having a slip joint pocketknife, a multi-tool, or a large hard-use folder on you to back up your heavy duty sheath knife.

One final suggestion: Keep your large knife attached to your pack when not in actual use. If your fixed blade is on the dresser at home it will do you no good when you need it. By keeping it attached to your pack, it will be readily available whenever you decide to go trail hiking or camping and less apt to be forgotten at home.


© 2013, MANNY SILVA, ALL RIGHTS RESERVED

Monday, November 18, 2013

Dayhike at Santa Margarita Lake, California

Recently I started a new job which starts work at 2:30 in the morning and finishes around 11 a.m. and involves split days off [if you guessed retail/night stocking you are correct]. This really threw my outdoor activities a curve. However, I did manage to get in a day hike two weekends ago.

I made a day hike at Santa Margarita Lake [San Luis Obispo County] California where our bushcraft group [CENTRAL COAST BUSHCRAFT/Facebook] had planned to do our 3rd annual gathering at the lake's Khus back country campground. Unfortunately things fell apart and we decided to call it an outing and do the annual later.

A few members still decided to go out and have some fun. Not wanting to let them down, I decided to hike out and visit for the day, having to be back at work the following night.

The hike to the campground was 4.4 miles. I took my day pack with all necessities in case I changed my mind and decided to stay over. Pack load went around 20# total. The lake is very low due to the drought, but still the Fall season was beautiful:


 As we reached the cutoff for the campground, my buddy snapped my picture:
 
 
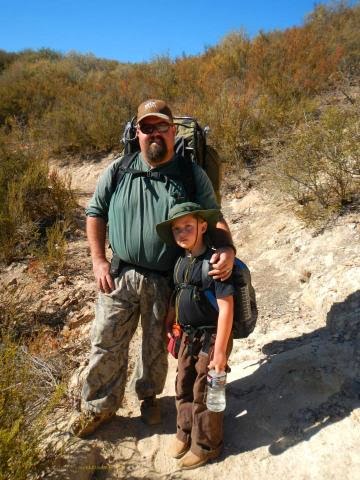
On the trail in we encountered a new member and his son hiking out:

 
I am not sure if he has a BCUSA handle so I won't use his real name. He and his son had spent the night. As I said, the hike in is 4.4 miles [8.8 round trip] and this young bushcrafter managed his own pack. I was very impressed with him and it is so good to see a Dad raising his boy up right in the woods tradition. I admire them both very much.

We encountered a horsewoman on the trail and she told us she'd seen a young man with a kayak encamped at the campground and we were pretty sure it was one of our newer members [again I do not know if he's on the forum either]. When we arrived at camp we found him there as we'd suspected:

 
Now I really admire this young man too, because he paddled 90 minutes from the marina with his pack load in an inflatable kayak to reach the campground and was scraping bottom the last several yards. Even had to walk through mud to reach shore, but he did it! He set up a nice campsite for the night:


The Khus campground was really nice. Grills, a very clean solar latrine, and a nice fire circle with benches. The only downside to this campground is it is heavily used by riders and there are corrals and hitching rails and thus it is somewhat smelly from horse droppings:


We are thinking of having a gathering their in Spring 2014 and we'll post that up on the BUSHCRAFTUSA.COM forum if anyone is interested in coming out.

Hopefully we'll get some rain this winter and the lake level will come back up and then we could maybe have some fishing too.

Kind regards,

Goblin Ranger


© 2013, MANNY SILVA, ALL RIGHTS RESERVED